No Adhesive? That's right, no adhesive!
I saw a picture of this cute box on Pinterest and loved the shape. When I realized that it didn't use adhesive to hold it together I knew I had to make a few of them! It's so easy that I want to share it with you.
 |
Isn't this little guy cute?
|
From the scoring layout to the finished product - here's your tutorial!
 |
10 1/2" X 9" DSP is the base size. Here is the whole layout of the paper.
|
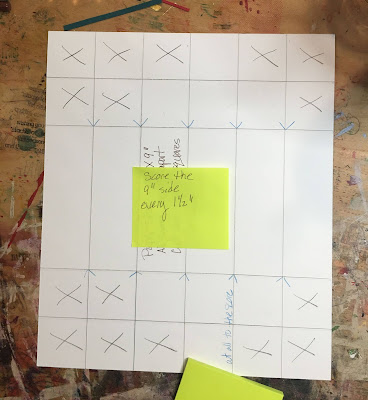 |
| Score 9" side every 1 1/2" |
 |
Score 10 1/2" side at 1 1/2", 3", 7 1/2" and 9"
|
 |
| Cut in to the second score line on both sides |
 |
Cut out all of the X'd squares
|
 |
DSP should look like this when you finish cutting.
|
 |
On the side that you want to be the inside of the box,
fold all of the scored lines in toward the center. |
 |
| It should look like this when you finish folding (use your bone folder) |
 |
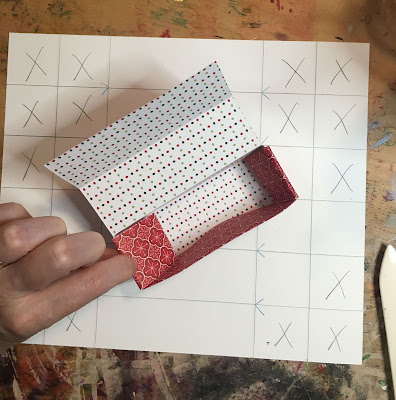
With the smaller end facing you, fold the first flap to the inside.
|
 |
Stand the flap up and fold in the short flaps like this.
|
 |
Fold the opposite side up and fold the end flaps in.
The two sets of flaps make the sides of the box.
|
 |
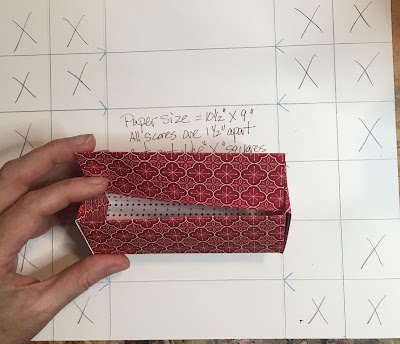
Fold the long end flap up and over to the inside.
I had to trim the side flaps a bit to keep it all folded tight. |
 |
Fold the other end up and over to the inside.
These side flaps hold the box securely without glue! |
 |
Now fold the top over and tuck in the front!
You might be tempted to trim the edges of this flap. Don't!
If you do, your box won't stay closed. Trust me! |
 |
Here's the finished box!
|
 |
You can make a cute belly band to go around it!
|
 |
Be sure you only attach the decorations to the belly band
and not to the box! If you do, your belly band won't slide off! |
I hope you like this little box and want to make your own! If you have any questions about it, please ask in the comments!
If you live in the US and don't have a demonstrator, I'd love to be yours!
Joyful Stamping, Elizabeth
Product List


Comments
Post a Comment